User Manual
Boon Airvana™
Smart Air Purifier with AtmoScan™
Everything you need to set up, use and look after your Boon Airvana™: unwrapping the filters, pairing with the Boon app, the touch buttons, filter care and warranty.
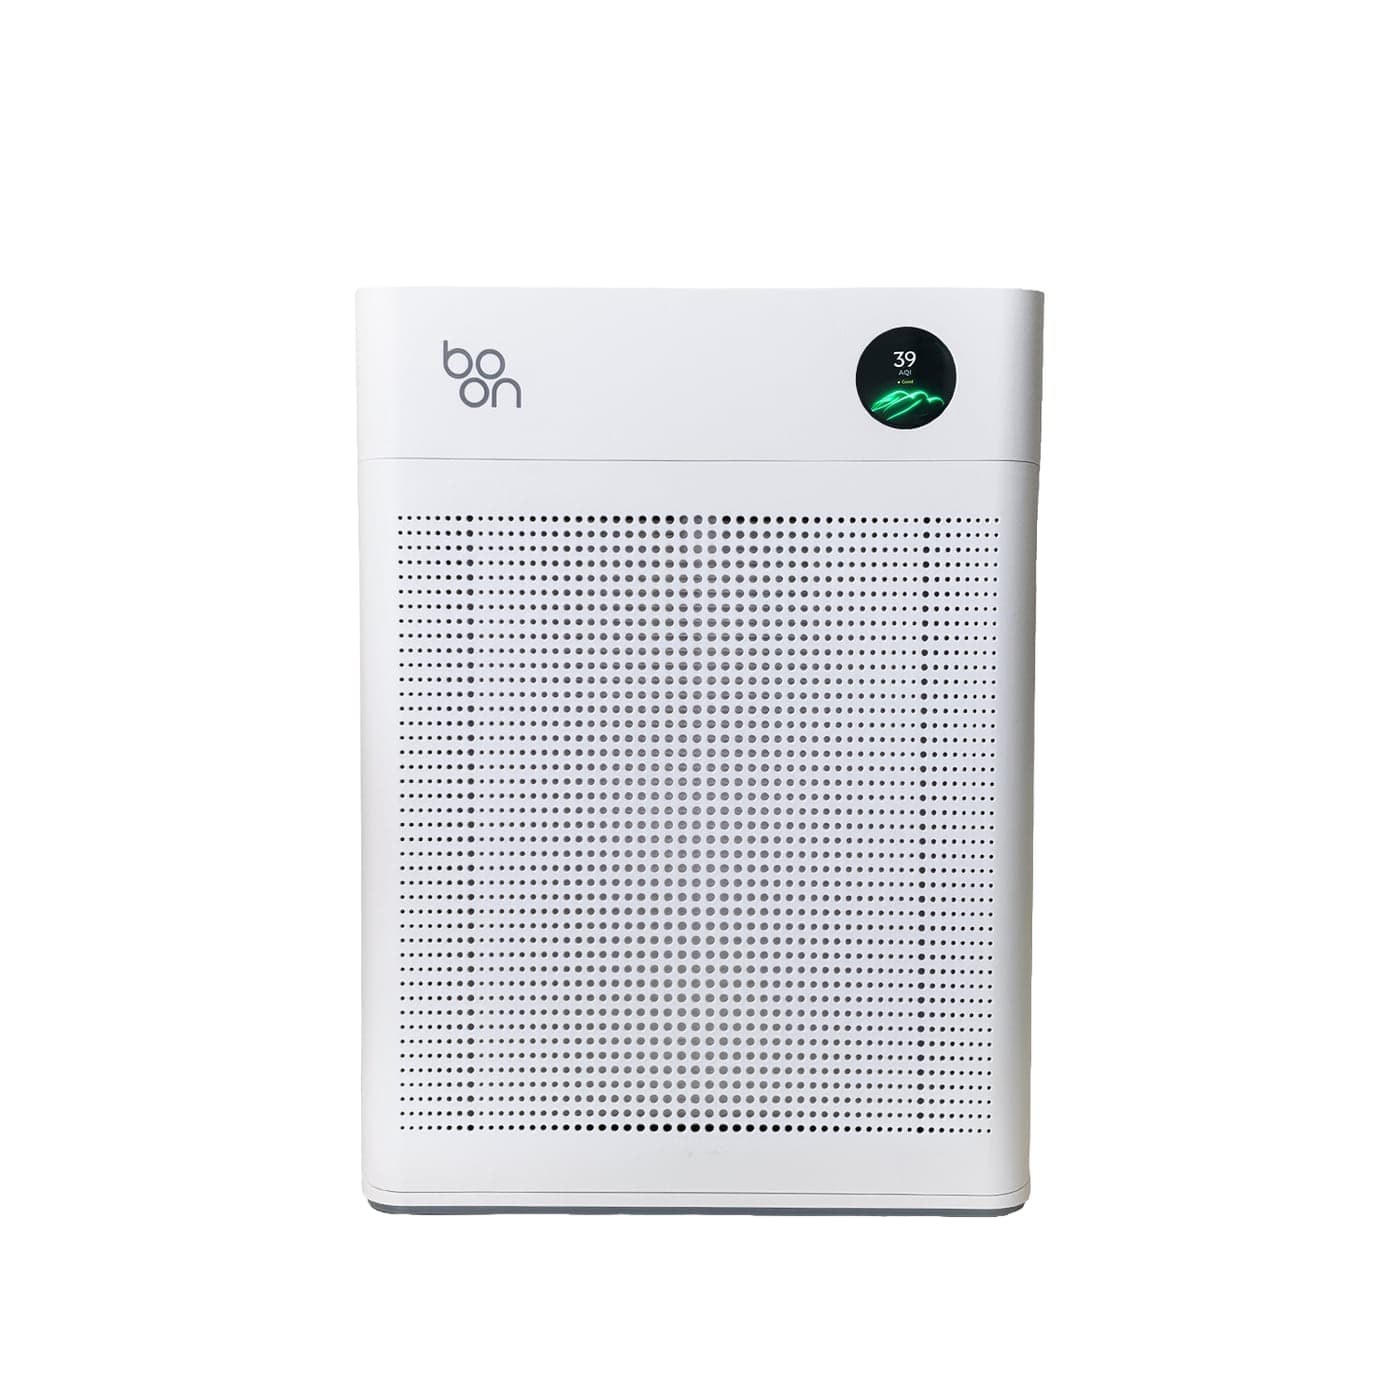
Quick-Start Video
Unwrapping the filters, pairing with the Boon app and every touch button, in 72 seconds. There is no sound: every step is captioned on screen, and each one is written out in full below.
Before First Use: Remove the Filter Wrapping
Airvana needs no installation. Unwrap the filters, plug it in and it is ready to use.
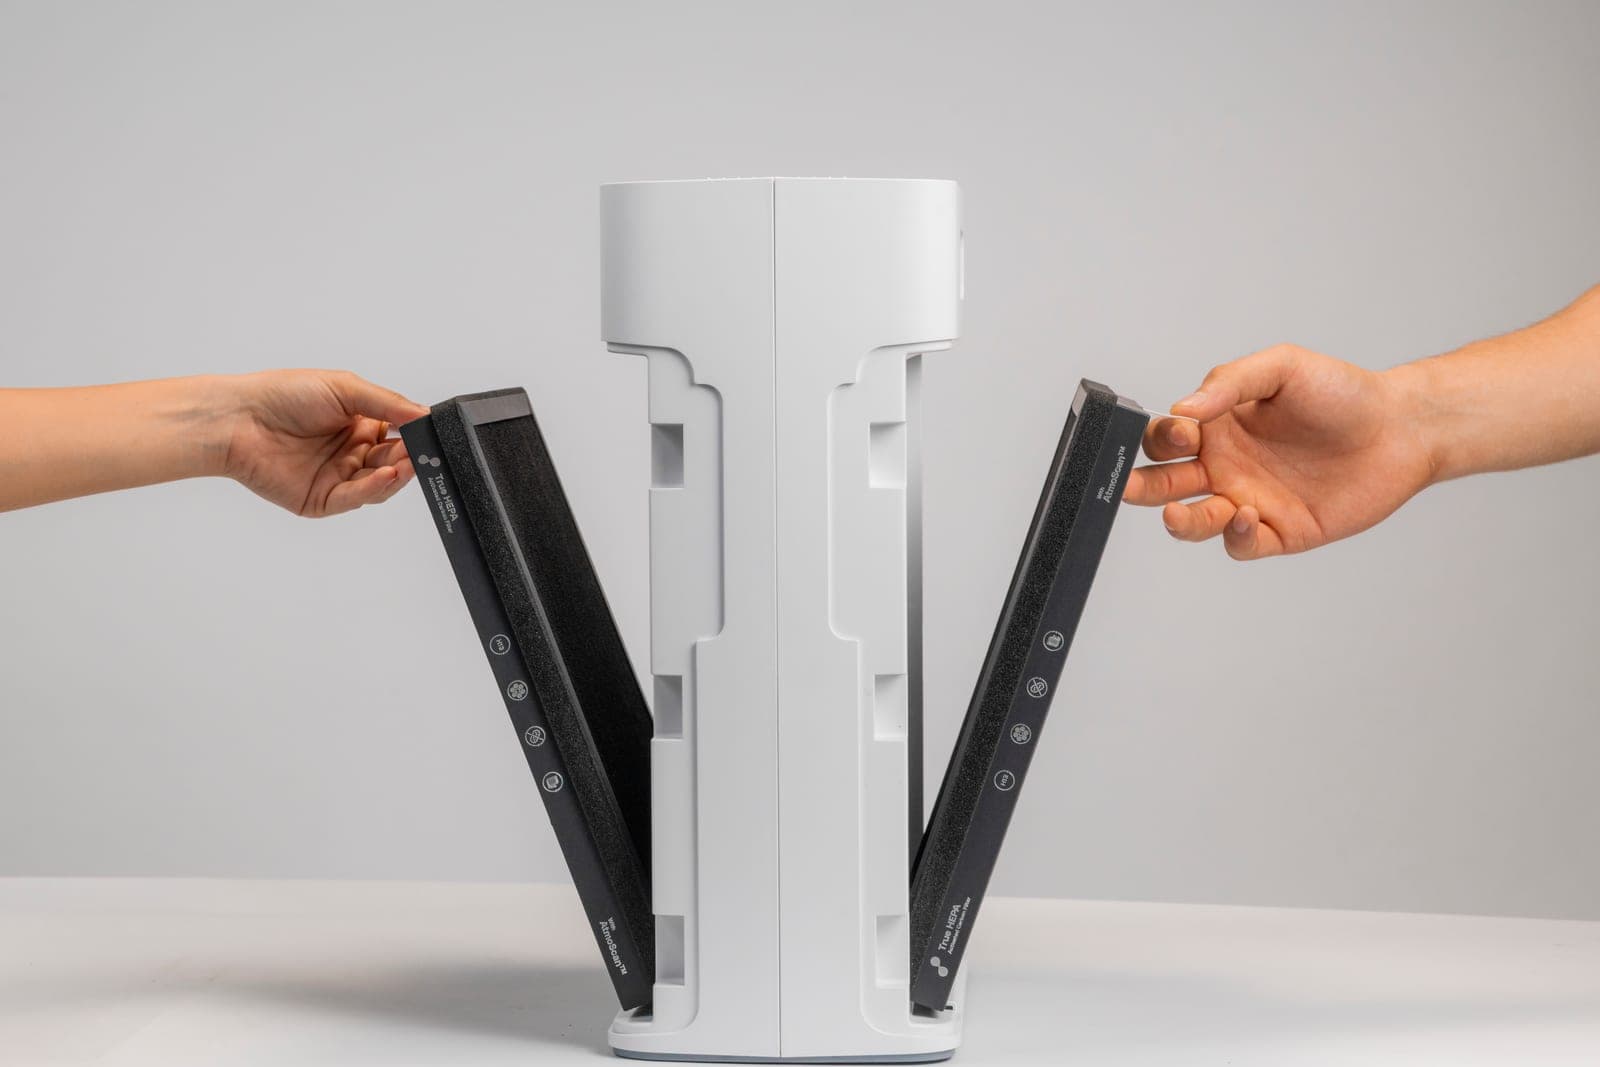
- Remove all packaging from the unit and stand it on a dry, flat, stable surface.
- Hold the grooves on both edges of one side panel and pull the panel outwards.
- Lift the filter set out of the unit.
- Remove all plastic wrapping from the filter.
- Put the filter back the way it came out, with the pre-filter mesh facing outwards.
- Refit the side panel: seat its lower edge in the grooves at the base first, then push the top gently until it clicks into place.
- Repeat steps 2 to 6 on the other side.
Switch on
- Connect the adapter to Airvana, then plug it into the wall socket.
- Press Power. Airvana chimes, the display comes on and it starts in Auto mode.
- Give AtmoScan™ a few minutes to settle before relying on the readings.
Pair with the Boon App
Airvana works fully without the app. The Boon app adds scheduling, alerts on your phone, diagnostics reports, insight cards and Auto-learn mode, which learns your routine and starts purifying before you get home.
Before you start
- Airvana connects to 2.4 GHz Wi-Fi only. It cannot join a 5 GHz network.
- Keep your phone's Bluetooth and location turned on during setup.
- Keep your phone close to Airvana.
Pair Airvana
- Download the Boon app from the App Store or Google Play, where it is listed as Boon WaterAI, then sign up and log in.
- Switch Airvana on, then press and hold Pair for 3 seconds.
- In the app, add a new device and choose Airvana.
- Select your 2.4 GHz Wi-Fi network and enter its password.
- Wait for the app to confirm that Airvana has been added, then tap it to open its controls.
Alexa and Google Home
Add Airvana to the Boon app first. Then, in the Alexa or Google Home app, link your Boon account: Airvana appears in your device list and can be added to your routines. Apple HomeKit support is expected soon.
Touch Buttons
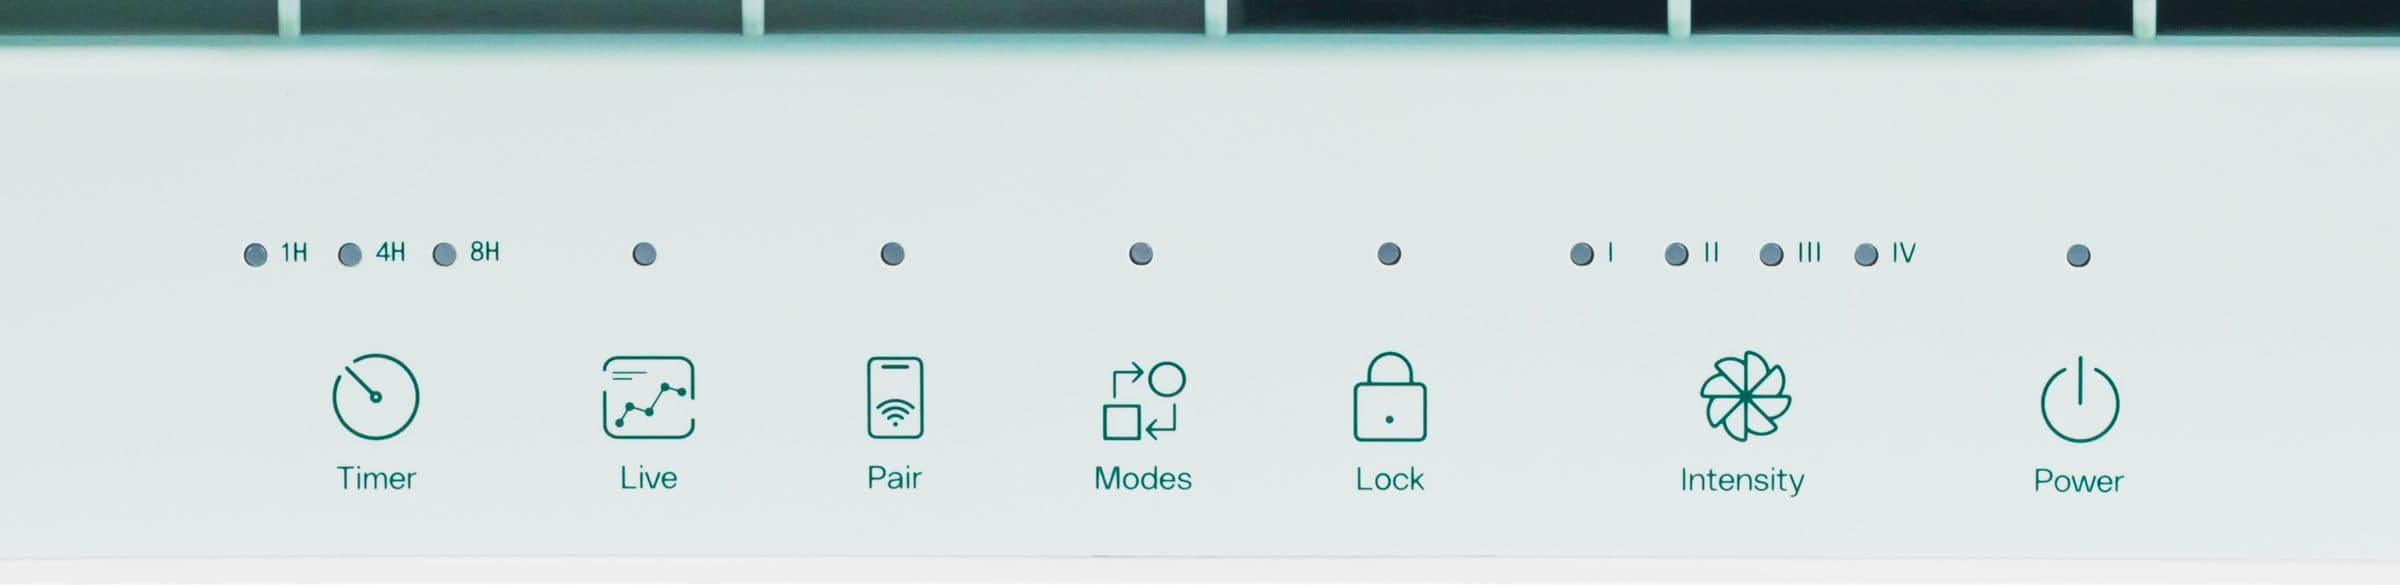
Every function is on the touch panel on top of Airvana, and it chimes to confirm each touch. The app is optional; the buttons do everything.
| Button | Press | Press and hold |
|---|---|---|
| Live | Change the display face: the AQI, the graph, then the detailed readings | — |
| Modes | Step to the next mode: Light, Sleep, Eco, then Auto | — |
| Pair | — | 3 seconds: pair with the Boon app |
| Intensity | Change the fan speed, from 1 to 4 | — |
| Lock | — | 3 seconds: lock or unlock every button (child lock) |
| Power | Switch Airvana on or off | — |
| Timer | Switch off after 1, 4 or 8 hours, or cancel the timer | — |
Modes and Display Faces
Press Modes to step through Light, Sleep, Eco and Auto, in that order.
Auto
The fan speed adapts in real time to everything AtmoScan™ reads, from PM1 to the gases most purifiers can't detect.
Default. Best for everyday use.
Sleep
Runs quietly, with as little disturbance as possible, for an undisturbed night.
Eco
Switches the fan off when the air is clean and back on when it isn't, to save electricity.
Manual
Press Intensity in any mode to set the fan speed yourself. Press Modes to move on to the next mode.
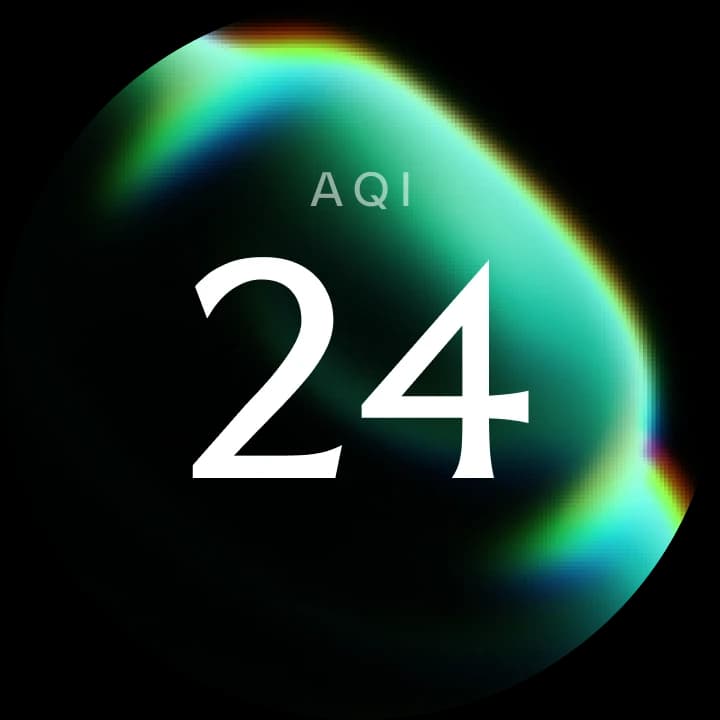
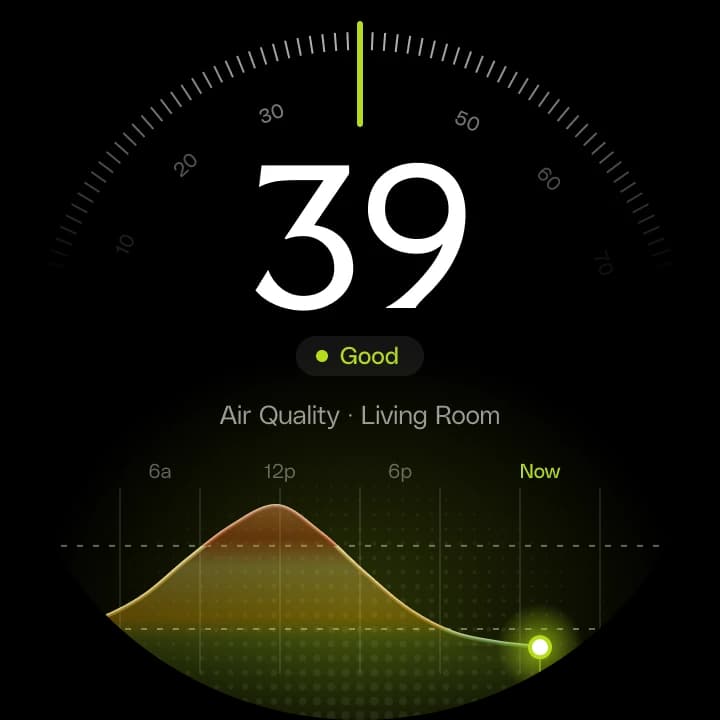
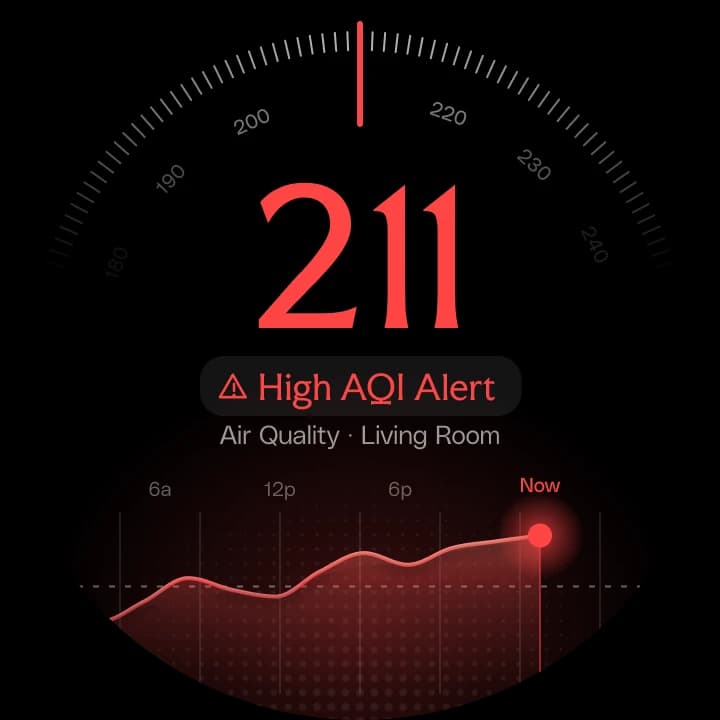
Display faces
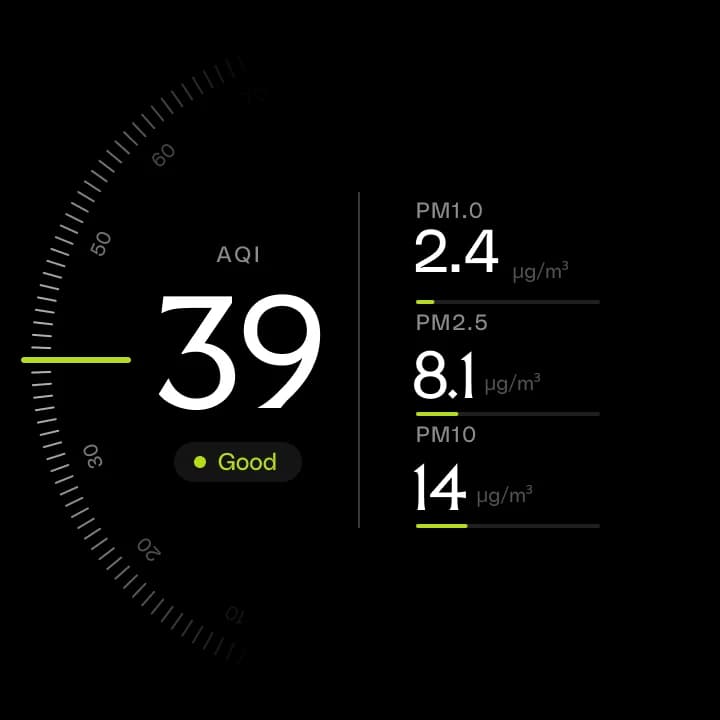
Press Live to move between faces. The number on every face is your room's live AQI; green means you're good.
Air Readings and Smart Alerts
AtmoScan™ reads eight parameters every second and shows them on the display and in the Boon app.
| Reading | What it tells you |
|---|---|
| PM1.0 | Ultrafine particles, which travel deepest into the lungs |
| PM2.5 | Fine particles such as smoke and fine dust |
| PM10 | Coarse particles such as dust and pollen-sized particles |
| TVOC | Volatile organic compounds from cooking, incense, cleaning products and paint |
| NO₂ | Nitrogen dioxide, mainly from vehicle exhaust |
| eCO₂ | Carbon dioxide, estimated from the gas sensor: a sign of a stuffy room |
| Temperature | Room temperature in °C |
| Humidity | Relative humidity in % |
Smart alerts
| Alert | Triggered by | What to do |
|---|---|---|
| Fresh air | eCO₂ building up in a closed room | Open a window or door for a few minutes. No purifier can filter out CO₂ |
| Cooking fume | A rise in TVOCs | Switch on the kitchen exhaust. In Auto, Airvana turns the fan up |
| Traffic pollution | A rise in NO₂ | Close the windows facing the road |
| Allergy | A rise in PM2.5 and PM10 | Keep Airvana in Auto. It turns the fan up |
| Clean pre-filter | Dust building up on the pre-filter mesh | Wipe the mesh with a dry cloth (see Filter care) |
| Filter change | A filter set nearing the end of its life | Fit two new filter sets (see Filter care) |
| Self-diagnostics | A sensor, filter or motor fault | Follow the message on screen or in the app, or contact Boon |
Where to Place Airvana
- Stand it on a firm, flat, level surface. Avoid carpets, rugs and soft surfaces.
- Airvana draws air in through both side panels and releases it from the top. Leave at least 10 cm clear on every side and 30 cm above it.
- Keep it at least 2 m from televisions, radios and radio-controlled clocks to avoid interference.
- Close doors and windows while it purifies, and open them when the fresh air alert tells you to.
- Airvana is sized for rooms up to about 484 sq ft. For larger or open-plan spaces, two units placed apart work better than one.
Filter Care and Replacement
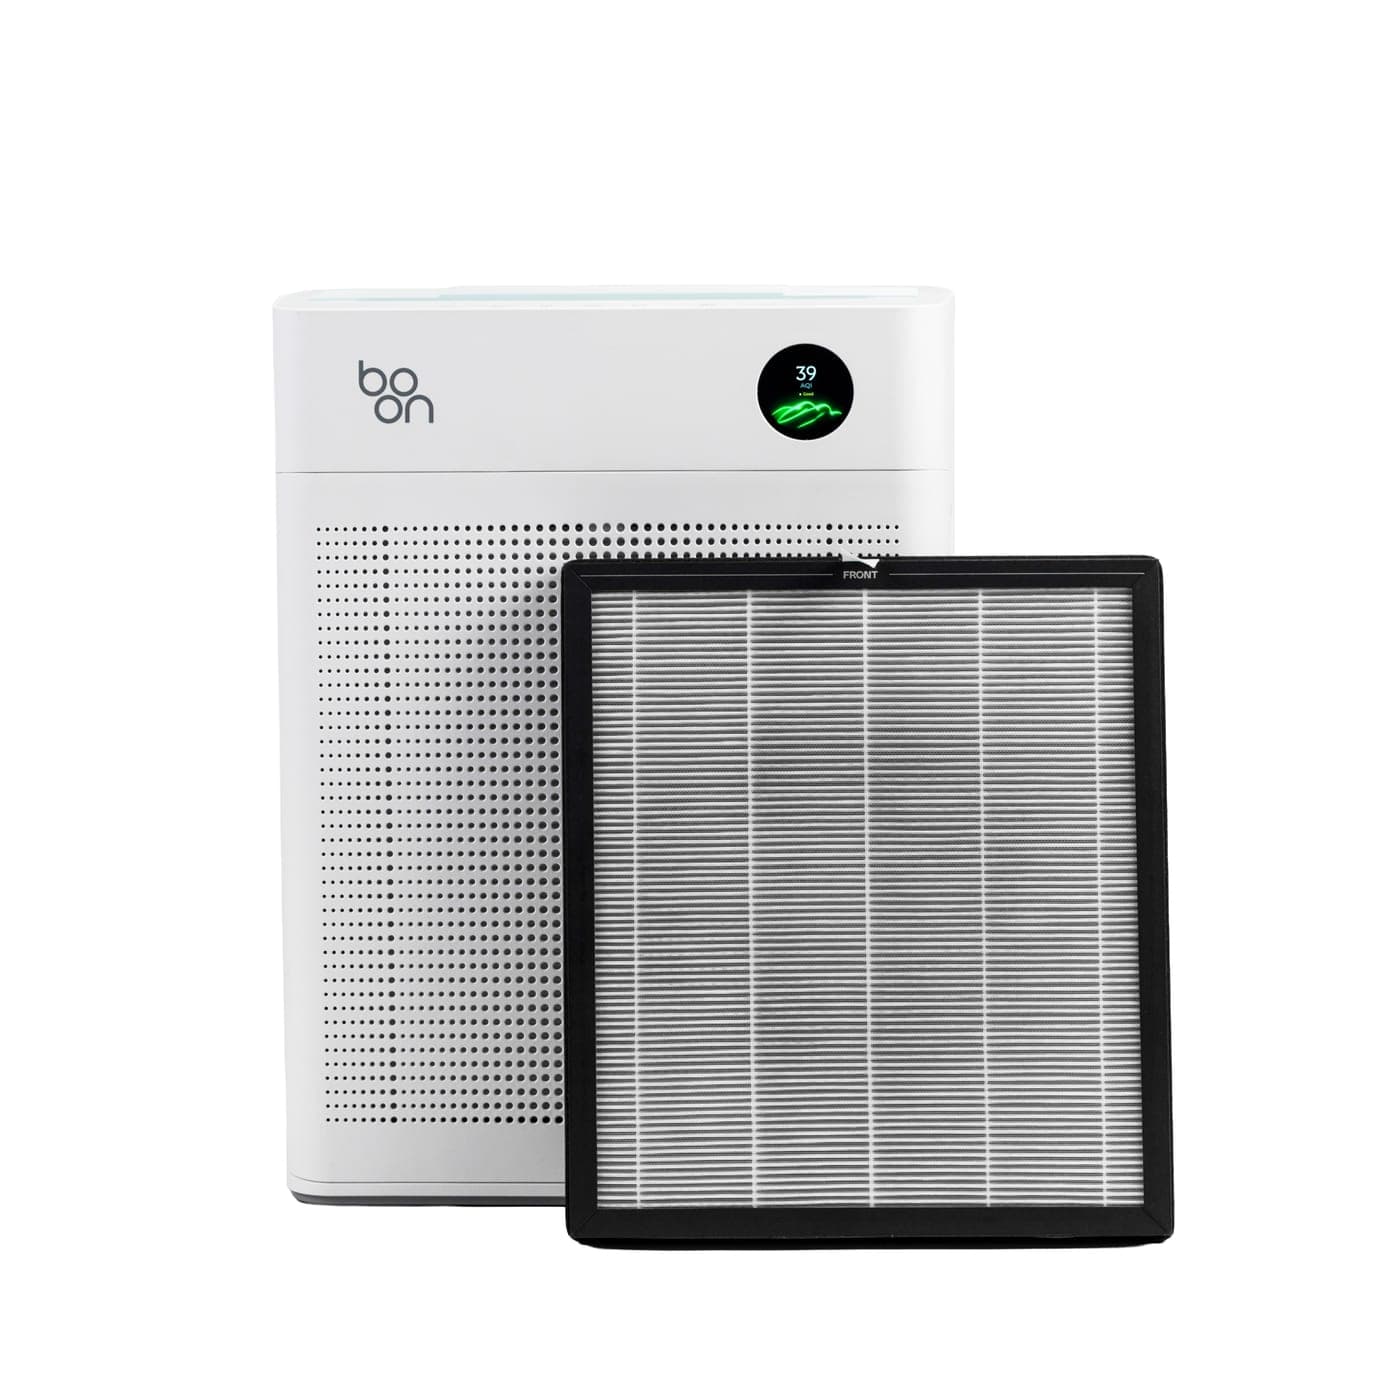
Airvana has two identical filter sets, one behind each side panel. Each set has four layers:
- Pre-filter mesh: traps hair and coarse dust. Reusable.
- Anti-bacterial coating: helps keep the HEPA layer from fouling.
- True HEPA: captures 99.95% of particles in a single pass.
- Activated carbon: absorbs gases and odours.
Cleaning the pre-filter
Clean the pre-filter when Airvana shows the clean pre-filter alert.
- Switch Airvana off and unplug it.
- Remove one side panel and lift out the filter set.
- Wipe the dust and hair off the pre-filter mesh with a dry cloth.
- Refit the filter and the side panel, then repeat on the other side.
Never wash the filters
- Do not wash the pre-filter or any filter layer, and do not let it get wet. Water damages the HEPA and carbon layers.
Replacing the filters
Filter life depends on how polluted your air is, so Airvana tracks it live and shows the filter change alert when replacement is due.
- Switch Airvana off and unplug it.
- Remove both side panels and lift out both used filter sets.
- Remove all plastic wrapping from the new filters.
- Fit the new filters with the pre-filter mesh facing outwards, and refit both side panels.
- Plug Airvana in and switch it on.
Cleaning and Storage
Always switch Airvana off and unplug it before cleaning.
- Body and side panels: wipe with a soft, dry cloth. For marks, use a cloth lightly dampened with water and wrung out well, then dry at once. Never let water drip into the unit.
- Display and touch panel: wipe gently with a dry microfibre cloth.
- Air outlet and side intakes: remove dust with a soft brush or a vacuum brush attachment.
- Do not use solvents, alcohol, abrasive cleaners or sprays.
Storing Airvana
- Clean both pre-filters and the body.
- Take out the filters, seal them in a plastic bag, and refit them before the next use.
- Store the unit upright in a cool, dry place, away from direct sunlight, preferably in its original box.
Troubleshooting
Try these checks before contacting Boon. If a problem persists, do not open the unit.
| Problem | Possible cause | What to do |
|---|---|---|
| Airvana does not switch on | Adapter not connected firmly, or the socket switched off | Check both ends of the adapter and the wall switch. Unplug, wait 10 seconds and plug in again. If the cord, plug or adapter is damaged, stop using it and contact Boon |
| Buttons do not respond | Child lock is on | Press and hold Lock for 3 seconds |
| Fan does not run | Standby, Eco has paused the fan, or the timer has ended | Press Power, and check the mode and timer on the display |
| Weak airflow | Plastic wrapping still on the filters | Remove all the wrapping (see Before first use) |
| Weak airflow | Intakes or outlet blocked, pre-filter clogged, or filters at end of life | Keep 10 cm clear on all sides and 30 cm above. Clean the pre-filter; replace the filters if the filter change alert is on |
| Unusual noise or vibration | Unit on an uneven or soft surface | Move it to a flat, firm surface. If it continues, switch off, unplug and contact Boon |
| AQI stays high in Auto | Doors or windows open, a room larger than about 484 sq ft, or filters at end of life | Close the room, add a second unit, or replace both filter sets |
| Readings look wrong | Sensor still settling, or dust on the unit | Wait a few minutes after switching on, and clean the body and intakes |
| Odour from the outlet | Carbon layer saturated | Replace both filter sets |
| Cannot connect to Wi-Fi | Router on 5 GHz, wrong password, or phone too far away | Use a 2.4 GHz network, re-enter the password, move closer and start pairing again |
| Self-diagnostics alert | A sensor, filter or motor fault | Note the message and contact Boon |
Safety Precautions
Power supply and cord
- Use only the adapter supplied with Airvana.
- Do not touch the plug or adapter with wet hands.
- Switch off and unplug Airvana before moving, cleaning or opening it, or changing a filter.
- Hold the plug, not the cord, when unplugging. Do not twist, pull, knot or pinch the cord, or place heavy objects on it.
- Do not use a damaged plug, cord or adapter, or a loose socket. A damaged cord or adapter must be replaced by Boon.
- If the cord, plug or adapter gets unusually hot, switch off at once and contact Boon.
- Unplug Airvana if you will not use it for a long time.
Using Airvana
- If Airvana gives off a burning smell, unusual noise or vibration, or behaves abnormally, switch it off, unplug it and contact Boon.
- Do not take apart, repair or modify Airvana yourself. Doing so can cause shock or fire, and voids the warranty.
- Do not put fingers or any object into the air intakes or outlet.
- Keep water, other liquids, flammable materials, cigarettes and sparks away from the unit.
- Do not use Airvana outdoors, in bathrooms, or in hot, humid or wet places, or right next to a cooking area where oil or grease is in the air.
- Switch Airvana off and leave the room while using insect sprays, fumigants or pest control. Never spray insecticide on the unit.
- Do not sit or stand on Airvana, or place anything on top of it.
- Airvana does not replace ventilation, regular vacuuming, or a kitchen chimney or exhaust fan.
Children and vulnerable users
- This appliance is not intended for use by persons (including children) with reduced physical, sensory or mental capabilities, or lack of experience and knowledge, unless they are supervised or have been instructed in its use by a person responsible for their safety.
- Supervise children to make sure they do not play with the appliance. Use the child lock to prevent accidental changes to settings.
Specifications
| Product | Boon Airvana™ Smart Air Purifier |
| CADR | 380 m³/h |
| Room coverage | Up to about 484 sq ft |
| Airflow | Dual suction: air drawn in from both sides |
| Filtration | Two filter sets, four layers each: pre-filter mesh, anti-bacterial coating, true HEPA, activated carbon |
| Sensor | AtmoScan™ Level 8: PM1.0, PM2.5, PM10 (laser-based), TVOC, NO₂, eCO₂ (estimated), temperature, humidity, read every second |
| Modes | Light, Sleep, Eco, Auto, plus manual fan speed |
| Fan speeds | 4 |
| Timer | 1, 4 or 8 hours |
| Display | Round full-colour display: full metrics, design, graph and alert faces |
| On-unit controls | Timer, Live, Pair, Modes, Lock, Intensity, Power |
| App | Boon app: modes, scheduling, child lock, alerts, Auto-learn mode, diagnostics, insight cards |
| Smart home | Google Home, Amazon Alexa; Apple HomeKit expected soon |
| Warranty | 7 years on the motor, 1 year on electrical parts (send-in) |
Specifications may change without notice as the product is improved. The full specification table is on the Boon Airvana™ page.
Warranty and Support
Airvana carries a send-in warranty: 7 years on the motor and 1 year on electrical parts, from the date of delivery. If something goes wrong, you send the unit to Boon's office, our team reviews it, and we repair or replace what is covered.
Warranty Covers
- Manufacturing defects in the motor under normal domestic use, for 7 years.
- Manufacturing defects and faulty electrical parts under normal domestic use, for 1 year.
- Repair or replacement, including labour, at no charge once the claim is approved.
Warranty Does Not Cover
- Filters, which are consumables.
- Non-genuine filters or parts.
- Opening, repair or modification by anyone other than Boon.
- Damage from dropping, mishandling, liquids, or power surges.
- Cosmetic wear that does not affect performance.
Making a claim
- Message Boon first, with your order number, a description of the problem, and a photo or short video if you can. Many issues can be solved remotely, so please do not send the unit before we reply.
- If it needs a hands-on review, we confirm the claim and you send the unit, securely packed (the original box is best), with your order number enclosed.
- Our team inspects it and repairs or replaces what is covered. Anything that is not covered is quoted first, and nothing is done without your approval.