Under Sink RO Water Purifier: The Complete 2026 Buying Guide
Published 1 June 2026 · Updated 16 September 2026
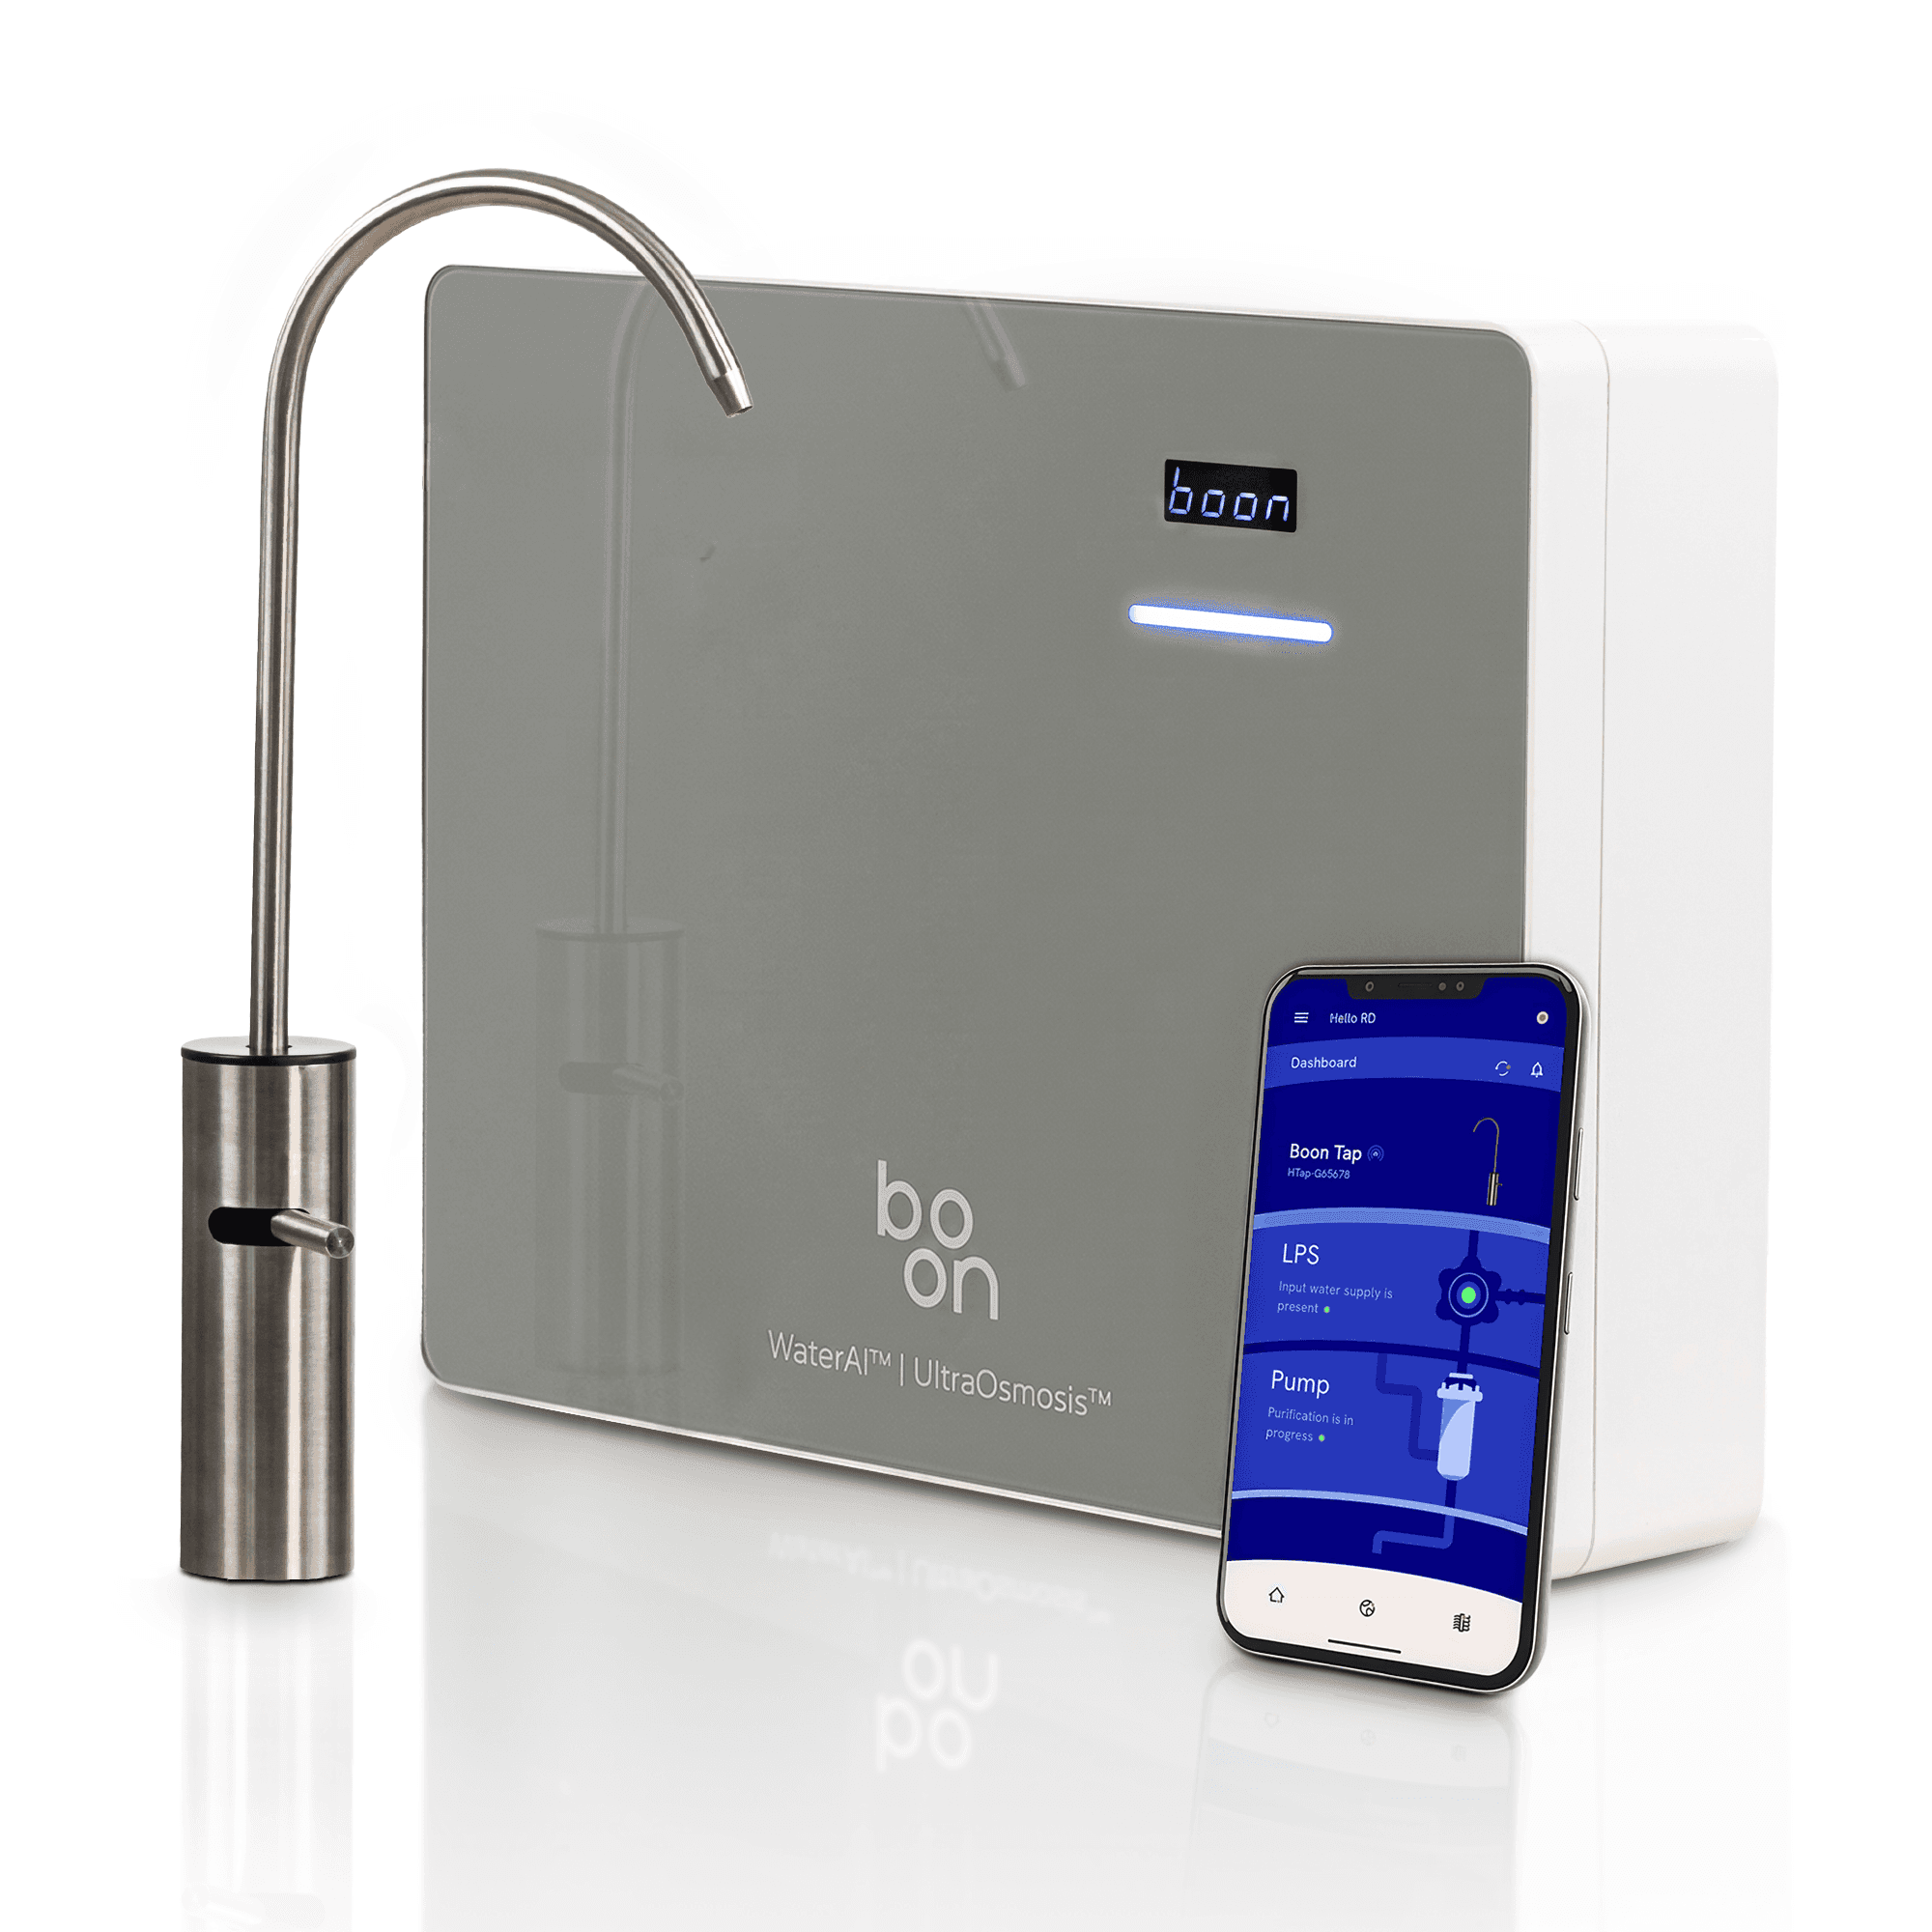
The short answer: an under sink RO water purifier is a reverse-osmosis system that lives inside the cabinet below your kitchen sink and sends purified water to a small dedicated tap on the counter. In India, a good one costs ₹12,000–35,000, needs roughly 50 cm of free cabinet width (or a wall inside the cabinet), one hole in the counter for the tap (24 mm for Boon Tap), a cold-water line, a drain and a power socket. Installation takes under two hours. The purification is the same as a wall-mounted RO; only the location changes.
What Is an Under-Sink RO Water Purifier?
An under-sink water purifier is a purification system installed inside the cabinet beneath your kitchen sink, out of sight. Instead of sitting on the counter or hanging on a wall, the whole unit — filters, RO membrane, storage tank and tubing — lives behind the cabinet door.
Purified water comes out of a dedicated tap mounted on the countertop, separate from your main kitchen mixer. Flick the tap, clean water flows. The purifier does its work below — no visible box, no blinking lights, nothing on the counter except the tap itself.
Under-sink RO has been the default in North American and European kitchens for decades. In India, where wall-mounted purifiers dominated for twenty years, the shift is recent and it is being driven by modular kitchens: integrated cabinetry is designed to hide appliances, and a plastic box on the wall is the one thing in the room that doesn’t belong. Modern under sink RO water purifiers are now slim enough to fit a standard Indian sink cabinet, which is what makes the format practical rather than aspirational.
If you are building or renovating a kitchen in 2026, under-sink should be your default, not the exception. The rest of this guide covers what it needs from your kitchen, what it costs, and what to check before you buy. (Still deciding between formats? Start with our under-sink vs countertop comparison.)
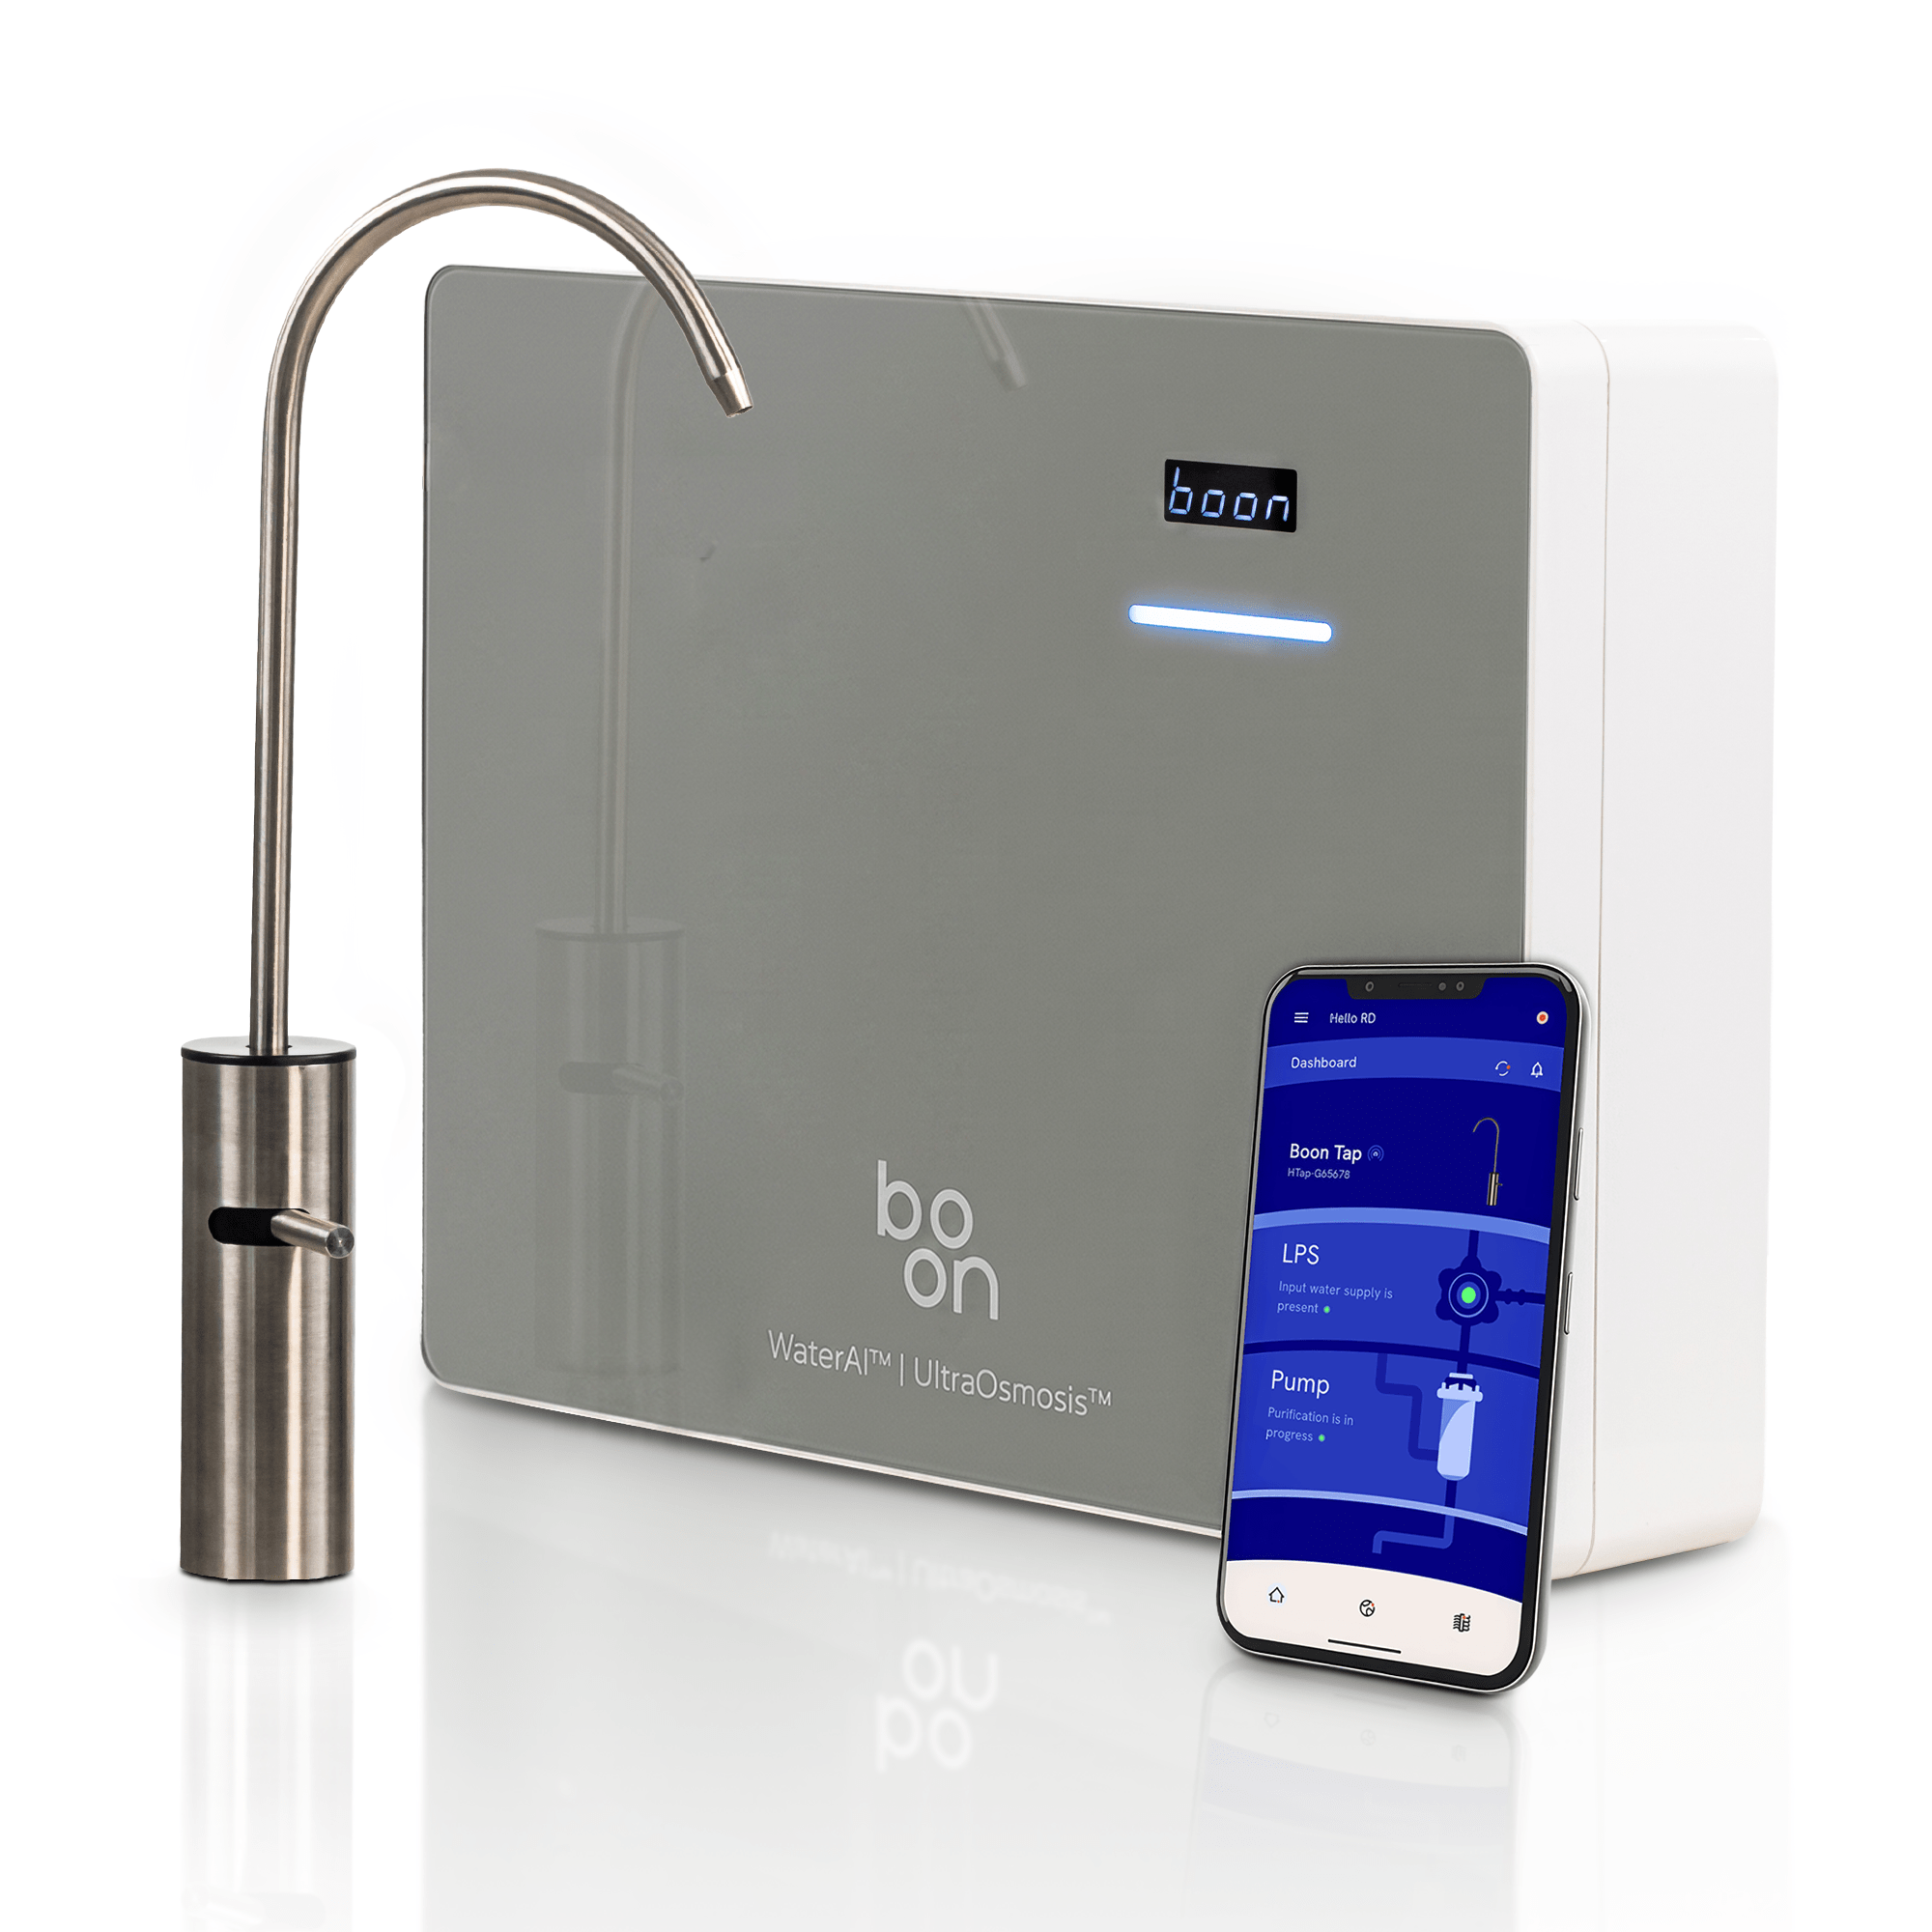
- 8-stage UltraOsmosis™ RO, handles input TDS up to 2,000 PPM
- 8-litre pressurised tank; unit only 11 cm deep (47 × 11 × 35.5 cm)
- Under-counter or wall-mounted — three install configurations
- WaterAI™ app + LED display on the unit, so you never open the cabinet to check it
- Free installation, free pre-filter, 2-year warranty, 10-day money-back guarantee
Under-Sink vs Wall-Mounted vs Countertop: Which Setup Is Right for You?
Most buyers in India default to wall-mounted because that is what they have always seen. The right choice depends on your kitchen layout, how much you care about the look, and whether you can drill the counter. Here is an honest comparison:
| Factor | Under-Sink | Wall-Mounted | Countertop |
|---|---|---|---|
| Visibility | Hidden; only a slim tap shows | Fully visible on the wall | Sits on the counter, always visible |
| Counter Space Used | Zero (one tap) | None, but takes wall space | 30–40 cm of counter |
| Cabinet Space Used | Part of the sink cabinet | None | None |
| Kitchen Aesthetics | Best — clean, clutter-free | Moderate — a box on the wall | Poorest — bulk on the counter |
| Installation | One counter hole, drain saddle, socket in cabinet | Wall drilling, basic plumbing | Plug and play |
| Filter Access | Open the cabinet door, front access | Easy — at eye level | Easiest — right there |
| Typical Price Range | ₹12,000 – ₹35,000 | ₹7,000 – ₹30,000 | ₹5,000 – ₹15,000 |
| Best For | Modular kitchens, design-led homes, rentals where drilling is allowed | Kitchens with free wall space near the sink | Rentals where nothing can be drilled, temporary setups |
The short version: if you have a modular kitchen or are building one, under-sink wins on looks and space. If you rent and cannot drill the countertop, wall-mounted or countertop is more practical. Purification quality is identical across all three — it is the same RO / UV / UF technology wherever the unit sits.
Will It Fit? Cabinet Measurements That Matter
This is the single most common mistake under-sink buyers make: the purifier arrives, the technician opens the cabinet, and it doesn’t fit — or fits so tightly the filters can’t be reached. Five minutes with a tape measure prevents it.
What to measure
- Usable width — between the cabinet side walls, minus the space taken by the drain trap and inlet pipes.
- Usable depth — from the front edge of the cabinet to the back wall. Pipes and the stopcock usually sit against the back wall, so measure in front of them.
- Usable height — from the cabinet floor to the lowest point of the sink bowl, not the counter. A deep single-bowl sink can drop 20–25 cm below the counter.
- What already lives there — the bin, the dishwasher inlet, cleaning supplies. The purifier and tank need their own space, and the filters need clear room in front of the unit for changes.
The actual numbers, using Boon Tap as the reference
Generic guides give you a vague “40 × 35 × 50 cm”. Here are real dimensions from the Boon Tap specification sheet, so you can lay them against your own cabinet:
| Component | Size | What it means for your cabinet |
|---|---|---|
| Purification unit | 47.0 × 11.0 × 35.5 cm (L × B × H) | Only 11 cm deep — it stands flat against the back or side wall of the cabinet, or mounts on the wall. |
| Pressure tank (8 L) | 24.7 cm diameter × 33.1 cm tall | Sits on the cabinet floor beside or in front of the unit; allow ~5 cm above it for the fitting. |
| Both, side by side | ~75 cm wide × 25 cm deep × 40 cm tall | Fits a standard 90 cm sink cabinet with room to spare. |
| Both, tank in front of unit | ~50 cm wide × 40 cm deep × 40 cm tall | Fits a 60 cm sink cabinet. This is the usual layout in Indian modular kitchens. |
| Tap on the counter | One 24 mm hole | See the tap-hole section below. |
If the cabinet is shallow or already full, you are not out of options. Because the Boon Tap unit is thin, it installs three ways: unit and tank together inside the cabinet; unit wall-mounted with the tank below it; or unit and tank both wall-mounted, stacked, which frees the cabinet floor entirely. The technician picks the configuration on the day based on what your cabinet allows.
If you can clear a 50 cm wide × 40 cm deep × 40 cm tall block on the cabinet floor, or free a stretch of wall inside the cabinet, an under-sink RO will fit. Most 60 cm and 90 cm Indian sink cabinets clear this easily once the bin moves.
Tap Hole Size for an Under-Sink Purifier
The purified-water tap needs its own hole in the countertop or sink deck. The size depends on the tap you buy, so check before anyone drills:
- Boon Tap needs a 24 mm hole. The tap has a weighted metal base and a solid SS 304 body, so the hole is larger than the 12 mm many basic plastic RO faucets use. Do not let a plumber drill for a “standard RO tap” without checking.
- The hole your kitchen mixer uses is too big. Kitchen mixers usually sit in a ~35 mm hole. A purifier tap in that hole needs an adaptor plate, so use a fresh hole rather than an unused mixer hole where possible.
- Where to put it: beside the mixer, on the side you fill bottles and pots from, with enough clearance behind for the tap’s base and the tubing underneath. Boon Tap swivels 360°, so it reaches both bowls of a double sink from one position.
- Granite and quartz are drilled with a diamond core bit in 10–15 minutes. A steel sink deck is drilled with a hole punch or step bit. Both are routine for a trained installer — Boon’s technician does it as part of the free installation. If you are paying a plumber separately, expect ₹200–500 for stone.
- Renting? Ask the landlord before drilling. Many agree once they see it is a single, clean 24 mm hole next to the mixer, not a wall full of brackets.
What to Look for in an Under-Sink RO Water Purifier
The core technology is the same as any RO. The under-sink context adds a few things most buying guides skip, because the unit is hidden and you cannot see it working.
1. Tank size, and knowing the level without opening the door
On a wall-mounted purifier you watch the tank drop and plan around it. Hidden under the sink, that cue is gone. So the two things that matter are:
- A tank sized for your household. The tank is the buffer that covers peak demand while the membrane refills. A family of four typically draws 12–15 litres a day, with 4–6 litres going in a single morning or evening rush. An 8-litre tank covers that; a 5-litre one leaves you waiting at the tap. The tank matters more than the litres-per-hour figure, because you drink from the tank, not straight from the membrane.
- A way to see status without opening the cabinet. A display on the unit helps; an app on your phone is better. It should show filter health, live TDS and alerts, so a hidden tank never catches you out mid-cooking.
2. Filter change access
Filters get changed every 12–24 months depending on the unit and your water. In a cabinet, the technician needs to reach the filter housings from the front with enough clearance to pull each cartridge out. Front-loading designs are far easier to service under a sink than top-loading ones, where the sink bowl is directly above the filter. Long filter life helps too: a system rated for up to two years between changes means far fewer visits into the cabinet.
3. Leak protection
A leak on a wall unit runs visibly down the wall. A leak under the sink can go unnoticed for days, swelling the cabinet base and starting mould. Look for good push-fit connectors rather than compression fittings, a unit that flags faults on a display or in an app, and put a shallow tray under the tank as cheap insurance.
4. Input TDS rating
Your input water’s TDS decides which membrane you need. Most residential RO membranes handle up to 2,000 PPM. In parts of Delhi NCR, Gurgaon and Rajasthan, borewell TDS runs past 1,500 PPM, so confirm the rating. Not sure of your number? Look it up in our city-wise water quality & TDS checker.
Also check how the purifier puts minerals back. A mineraliser adds calcium and magnesium after RO; a TDS controller blends some unpurified water back in. The mineraliser approach is safer because nothing bypasses the membrane — we break it down in TDS controller vs mineraliser.
5. Water wastage ratio
Every RO produces reject water. Under a sink the reject line runs straight into the drain, so it is easy to forget it exists. Standard RO rejects about 3 litres per litre purified (25% recovery); efficient units do 1:2 or better. Check the figure before buying, and see our tips to reduce RO water wastage by routing reject water to mopping or plants.
6. Who installs it, and what that costs
Under-sink installation involves drilling the counter, tapping the cold line, clamping a drain saddle and testing every joint. Some brands charge for this or hand you to a third-party plumber. Ask whether installation, the pre-filter and the tap are included, and who comes if something leaks in month three.
Under-Sink RO Price in India (2026)
Under-sink RO purifiers in India sell in three bands. The sticker price is only part of the picture — filters, service and AMC over the years usually cost as much again.
| Band | Price | What you typically get |
|---|---|---|
| Budget | ₹12,000 – ₹16,000 | Basic RO, plastic tap, 5–6 L tank, no monitoring, paid installation, yearly AMC pushed at sale. |
| Mid-range | ₹18,000 – ₹25,000 | Multi-stage RO with mineral enhancement, 8 L tank, steel tap, app monitoring, free installation, 2-year warranty. Boon Tap (from ₹23,500) and Boon Tap UF (₹20,500) sit here, at the time of writing. |
| Premium / imported | ₹28,000 – ₹35,000+ | Imported systems, often without India-tuned membranes or a local service network. Filters can be hard to source. |
The number that matters: cost over four years
Take a mid-range unit at ₹20,990 with a two-year warranty and filters that last up to two years. Over four years you pay the purchase price plus one full filter set at ₹4,000 — about ₹25,000 all in. A cheaper unit with a ₹7,500 yearly filter-and-AMC bill costs ₹30,000 in filters alone over the same four years, before you count the purifier. Free installation is worth another ₹1,000–2,000 against a unit that charges for the plumber, the drilling and the pre-filter. Read our true cost of owning a water purifier before you decide on price alone.
RO or UF Under the Sink?
Not every kitchen needs RO. The decision is your input water’s TDS:
- Above roughly 500 PPM (borewell, tanker, mixed supply, most of NCR, Rajasthan, parts of Bengaluru and Hyderabad): you need RO. It removes dissolved salts and heavy metals a UF membrane cannot.
- Below about 300 PPM (treated municipal supply in much of Mumbai, Pune, Kolkata and the hill cities): UF is the better under-sink choice. It removes bacteria, cysts and turbidity, keeps the natural minerals, and sends no water to the drain.
- In between: check the water rather than guess. Municipal supply can swing with the season, and a TDS meter costs a few hundred rupees.
Boon Tap comes in both: Boon Tap RO for high-TDS water and Boon Tap UF for low-TDS municipal supply, on the same unit, tank and tap. For the technology itself, see RO vs UV vs UF.
Installation: What to Expect
Under-sink installation is more involved than wall-mounting, but not complicated for a trained technician. Here is what a proper job looks like.
What the kitchen needs
- Cold water line — the purifier taps into the existing cold supply under the sink with a T-connector. No new plumbing line.
- Drain connection — the reject line clamps onto the sink’s drain pipe with a drain saddle. The pipe is not cut or replaced.
- The tap hole — one hole in the counter (24 mm for Boon Tap), drilled on the day.
- A power socket inside the cabinet — RO needs electricity for the pump and UV. Most modular kitchens have a socket under the sink; if yours doesn’t, an electrician adds one for under ₹1,000. Do not run an extension cord into a cabinet with water in it.
How long it takes
A competent technician finishes an under-sink RO installation in 60–90 minutes; Boon quotes under two hours including drilling the counter, flushing the system and walking you through the display and app.
What a good installer checks
- Input TDS before starting, to confirm the membrane suits your water.
- Inlet pressure — the purifier needs steady pressure to run. Boon Tap runs its own pump (you can see its status in the app), so low mains pressure is not a blocker.
- A leak test at every joint after 10 minutes of running, checked dry-handed.
- Output TDS, measured and shown to you. RO output is typically 30–80 PPM before mineral enhancement.
- Free flow on the reject line — a kinked drain line shortens membrane life.
The pre-filter matters more than you think
A sediment pre-filter ahead of the unit catches sand, rust and pipe debris before it reaches the RO membrane — and in Indian cities, especially after pipeline work or during the monsoon, there is plenty of it. Make sure one is included and fitted; Boon includes it free with every system.
Want to see how Boon Tap stacks up against everything else on the market? Read our Best Water Purifier in India 2026 ranking, or the full Boon Tap installation guide and user manual.
Explore Boon Tap →Boon Tap as an Under-Sink Solution
Boon Tap was built around one idea: the purifier you don’t have to look at. The unit and tank hide inside the cabinet; the only thing on the counter is a solid stainless-steel tap. It is the reference product in this guide because it solves the specific problems an under-sink buyer has, not just the general ones.
Slim enough to fit, three ways to install
The purification unit is 11 cm deep with a glass front, so it stands flat against a cabinet wall or mounts on it. Together with the 8-litre tank it fits a standard 60 cm sink cabinet; if your cabinet is spoken for, the unit and tank wall-mount, stacked or side by side. The same purchase works whatever your kitchen allows.
A tap you will actually want on show
Because the tap is the only visible part, Boon Tap comes in three finishes — Gunmetal Grey, Matte Black and Soul Silver. It is milled from SS 304 with a weighted metal base, a 360° swivel and a one-touch toggle, and it needs a 24 mm hole in the counter.
You always know what a hidden unit is doing
This is the feature that matters most under a sink. The unit itself carries a digit display and a colour-coded LED alert bar, so one glance inside the cabinet shows live TDS and status. The WaterAI™ app goes further: real-time TDS, flow and water quality, predictive filter-health alerts based on your actual usage rather than a fixed six-month timer, and an Away mode that flushes the system every 24 hours while you travel. The WaterAI app won an iF Design Award 2026. Wi-Fi is only needed for the app; the tap and display work fully offline.
8-stage UltraOsmosis™, RO or UF, 8-litre tank
Boon Tap runs 8-stage UltraOsmosis™ purification — grooved sediment and carbon pre-filtration, the RO membrane with anti-scale protection, natural mineral enhancement and a mirrored UV chamber — handling input TDS up to 2,000 PPM, with an 8-litre pressurised tank and a 20 LPH membrane behind it. Three Water Profiles (Daily, Active, Bev) tune the mineral dose after RO; nothing bypasses the membrane. Choose RO for borewell and high-TDS supply, or the UF variant for low-TDS municipal water. Read more about UltraOsmosis™ and WaterAI™.
Free installation by Boon’s own technicians, and no AMC
Boon-certified technicians install it free, usually in under two hours: they measure the cabinet, choose the configuration, drill the 24 mm tap hole, route the plumbing, fit the free pre-filter, leak-test every joint and measure output TDS before leaving. Boon Tap carries a 2-year warranty with filters rated for up to two years; after that there is no AMC — a full filter set is ₹4,000, and you pay only for the part you need. There is a 10-day money-back guarantee on every unit. The full terms are on the warranty and maintenance page.
Why Boon Tap works under a sink: it was designed to be hidden in the first place; a display on the unit and the WaterAI™ app mean you always know the state of a tank you cannot see; the 8-litre buffer covers peak demand; three install configurations mean it fits kitchens where other under-sink units don’t; and free installation removes the drilling-and-drain complexity. See the Boon Tap under sink RO water purifier →
Common Mistakes to Avoid When Buying an Under-Sink RO Purifier
We see these repeatedly. Each one is avoidable with a little planning.
1. Not measuring the cabinet
The most common and most frustrating mistake. Measure usable width, depth and height (to the bottom of the sink bowl, not the counter) before you shortlist, and account for the pipes and the bin. The numbers in the fit section above are real ones to check against.
2. Drilling the wrong tap hole
A plumber who drills 12 mm for a “standard RO tap” leaves you with a hole that is too small for a steel tap like Boon’s (24 mm) — and stone cannot be un-drilled. Confirm the size for the specific tap, or let the brand’s installer drill it.
3. Ignoring the drain connection
The reject line needs a sound drain pipe to clamp onto. Old, brittle PVC or an awkwardly placed trap can make the saddle connection difficult. Have the technician look at the drain routing before installation day, not on it.
4. Wedging the unit where the filters can’t be reached
If the filter housings face the back wall, every service becomes an ordeal: pull the unit out, disconnect, replace, reconnect, leak-test again. Position it so the filters face the cabinet door with clearance to pull them out.
5. Chasing litres-per-hour instead of tank size and visibility
For a hidden unit, what protects you from waiting at the tap is a well-sized tank plus a way to see its status. A generous tank buffers peak demand while the membrane refills; a display or app tells you where things stand. That combination beats a big LPH number you cannot monitor.
6. Skipping the pre-filter
Without a sediment pre-filter, the membrane takes the full force of raw water — sand, rust, pipe debris. It clogs faster and dies sooner. A ₹200–400 pre-filter is the cheapest insurance there is; make sure it is fitted, not just in the box.
7. Not planning for power
Cabinets do not always have a socket. Running an extension cord into a cabinet with water in it is a hazard. Plan the outlet before the purifier arrives; it is a 30-minute job for an electrician.
Frequently Asked Questions
What is an under-sink RO water purifier?
An under-sink RO water purifier is a reverse osmosis system installed inside the cabinet beneath your kitchen sink. It connects to the cold water line, sends reject water to the sink drain, and dispenses purified water through a dedicated tap on the countertop. The purifier, tank and tubing stay hidden inside the cabinet. The purification technology is identical to wall-mounted or countertop RO; only the location differs.
How much space do I need under the sink for an RO purifier?
Roughly a 50 cm wide, 40 cm deep, 40 cm tall block of free space on the cabinet floor, or a free stretch of wall inside the cabinet. As a reference, the Boon Tap unit is 47 × 11 × 35.5 cm and its 8-litre tank is 24.7 cm across and 33.1 cm tall; together they fit a standard 60 cm Indian sink cabinet with the tank in front of the unit, or wall-mount if the floor is taken.
What size hole does an under-sink water purifier tap need?
It depends on the tap. Basic plastic RO faucets often use a 12 mm hole; a solid steel tap such as Boon Tap needs a 24 mm hole. The ~35 mm hole a kitchen mixer uses is too large without an adaptor plate. Confirm the size for your specific tap before anyone drills, because stone cannot be un-drilled. Boon’s technician drills the hole as part of the free installation.
How much does an under-sink RO water purifier cost in India?
Between ₹12,000 and ₹35,000 in 2026. Budget units start around ₹12,000 but usually charge for installation and push a yearly AMC. Mid-range units at ₹18,000–25,000 — Boon Tap is from ₹23,500 and Boon Tap UF ₹20,500 at the time of writing — include installation, an 8-litre tank, app monitoring and a 2-year warranty. Over four years, filter costs matter as much as the sticker price: one ₹4,000 filter set versus ₹7,500 every year adds up to a ₹26,000 difference.
Can any RO water purifier be installed under the sink?
No. The unit must be compact enough to fit the cabinet with room to change filters, and it needs a storage tank sized for the household plus a way to know the tank level without seeing it. Units designed only for wall-mounting may have the wrong port orientation and drain routing for a cabinet. Confirm under-sink compatibility before buying.
Can an under-sink water purifier be wall-mounted instead?
Some can. Boon Tap installs three ways: unit and tank together in the cabinet, unit on the wall with the tank below, or unit and tank both wall-mounted and stacked. That flexibility matters in kitchens where the cabinet is shallow or already full.
Does an under-sink RO purifier need electricity?
Yes. The pump and UV stage run on mains power, so you need a socket inside or near the cabinet. If there isn’t one, an electrician can add it for under ₹1,000. Never run an extension cord into a cabinet that carries water.
How long does under-sink installation take?
60–90 minutes for a trained technician, including drilling the tap hole, connecting the cold line and drain, fitting the pre-filter, flushing the system and checking output TDS. Boon quotes under two hours and includes the installation free.
How do I know when to change filters if the purifier is hidden?
Choose a unit with a display on the purifier or, better, app monitoring that predicts filter life from your actual water and usage rather than a fixed six-month timer. Boon Tap shows status on an LED bar on the unit and sends filter-health alerts through the WaterAI™ app, so you never need to open the cabinet to check.
Does an under-sink RO purifier waste more water?
No. Wastage depends on the membrane’s recovery rate, not where the unit sits. A typical RO produces 1 litre of purified water for every 2–3 litres of input. Under a sink the drain connection is shorter and more direct, which if anything simplifies the plumbing. If your water is low in TDS, a UF unit sends nothing to the drain at all.
Boon Tap: 8-stage UltraOsmosis™ RO, an 8-litre tank, WaterAI™ monitoring, three tap finishes, three install configurations, from ₹23,500 at the time of writing, installed free, with a 2-year warranty and a 10-day money-back guarantee.
See the Boon Tap under sink RO water purifier →Next step
Boon Tap is the under-sink purifier this guide is built around.
8-stage UltraOsmosis™ RO, an 8-litre tank and WaterAI™ monitoring — from ₹23,500, installed free, 2-year warranty, 10-day money-back guarantee.
See the Boon Tap under sink RO water purifier